
In today’s blog, we will be building a Cats and Dogs Classifier using Convolutional Neural Networks. This is going to be a very fun blog, so without any further due, Let’s do it…
Step 1 – Importing required libraries for Cats and Dogs Classifier.
import numpy as np
import pandas as pd
from keras.preprocessing.image import ImageDataGenerator, load_img
from keras.utils.np_utils import to_categorical
from sklearn.model_selection import train_test_split
import matplotlib.pyplot as plt
import random
import os
from keras.models import Sequential
from keras.layers import Conv2D, MaxPooling2D, Dropout, Flatten, Dense, Activation, BatchNormalization
from keras.callbacks import EarlyStopping, ReduceLROnPlateau
import cv2
Step 2 – Initializing some constants.
IMAGE_WIDTH=128
IMAGE_HEIGHT=128
IMAGE_SIZE=(IMAGE_WIDTH, IMAGE_HEIGHT)
IMAGE_CHANNELS=3
Step 3 – Loading input data for Cats and Dogs Classifier.
filenames = os.listdir("train")
categories = []
for filename in filenames:
    category = filename.split('.')[0]
    if category == 'dog':
        categories.append(1)
    else:
        categories.append(0)

df = pd.DataFrame({
    'filename': filenames,
    'category': categories
})- We have all our images in the train folder. So os.listdir(‘train’) will give a list of all image names.
- Then we are just traversing in all images and extracting their category (dog or cat) from image names.
- Finally, we are creating a dataframe of our data.
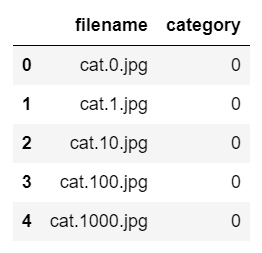
Step 4 – Checking the head of the data.
df.head()
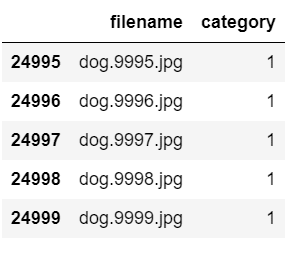
Step 5 – Checking the tail of the data.
df.tail()
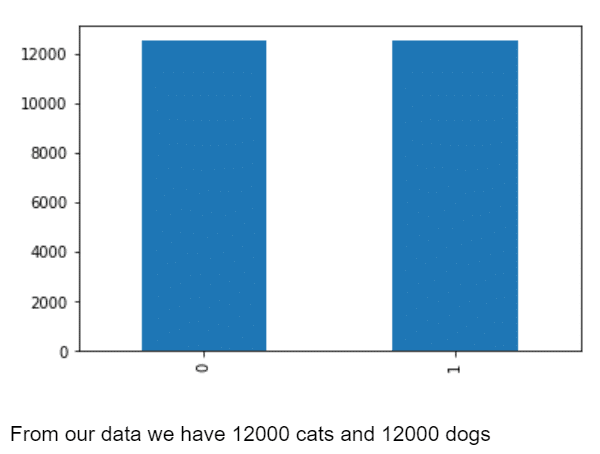
Step 6 – Visualizing category column.
df['category'].value_counts().plot.bar()
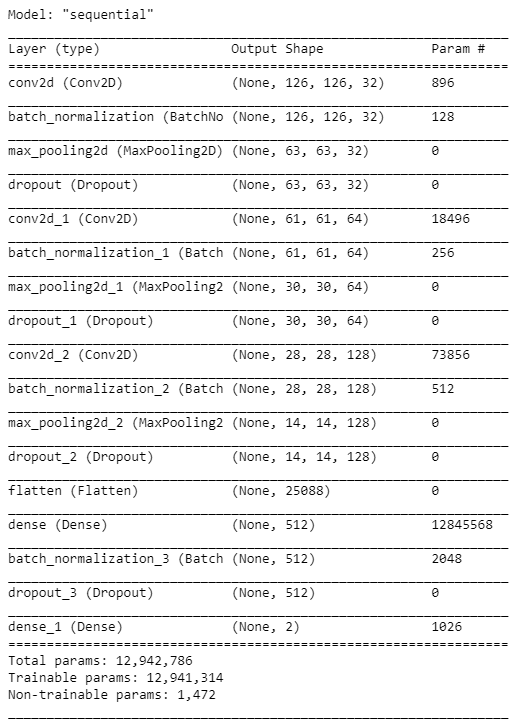
Step 7 – Building the model for the Cats and Dogs Classifier.
model = Sequential()

model.add(Conv2D(32, (3, 3), activation='relu', input_shape=(IMAGE_WIDTH, IMAGE_HEIGHT, IMAGE_CHANNELS)))
model.add(BatchNormalization())
model.add(MaxPooling2D(pool_size=(2, 2)))
model.add(Dropout(0.25))

model.add(Conv2D(64, (3, 3), activation='relu'))
model.add(BatchNormalization())
model.add(MaxPooling2D(pool_size=(2, 2)))
model.add(Dropout(0.25))

model.add(Conv2D(128, (3, 3), activation='relu'))
model.add(BatchNormalization())
model.add(MaxPooling2D(pool_size=(2, 2)))
model.add(Dropout(0.25))

model.add(Flatten())
model.add(Dense(512, activation='relu'))
model.add(BatchNormalization())
model.add(Dropout(0.5))

model.add(Dense(2, activation='softmax')) # 2 because we have cat and dog classes

model.compile(loss='categorical_crossentropy', optimizer='rmsprop', metrics=['accuracy'])

model.summary()
- Here we have created a sequential Keras model which is very easy to use. Just use model.add() and keep on adding layers as per your use case’s convenience.
- Here we have basically used 3 sets of Conv2D – BatchNormalization – Maxpooling – Dropout layers.
- And after that, we flattened the results from these layers and passed on those results to Dense layers or Fully connected layers.
- The last Dense layer would always contain n no. of nodes where n is the no. of classes in the dataset.
- The last step in building the model is model.compile() which is used to put together everything we did above.
- We use categorical cross-entropy here because we have 2 categories here, we used rmsprop optimizer, we could have also used adam but rmsprop was giving better results in this case, and the metrics on what we will measure the performance of our model is accuracy.
Step 8 – Initializing Callbacks for Cats and Dogs Classifier model.
earlystop = EarlyStopping(patience=10)

learning_rate_reduction = ReduceLROnPlateau(monitor='val_accuracy',
                                            patience=2,
                                            verbose=1,
                                            factor=0.5,
                                            min_lr=0.00001)

callbacks = [earlystop, learning_rate_reduction]- Simply initializing EarlyStopping and ReduceLROnPlateau here.
- EarlyStopping stops the training earlier when val_accuracy stops increasing or val_loss stops decreasing.
- ReduceLROnPlateau reduces the learning rate when our model reaches near the minima of the loss function.
Step 9 – Replacing 0s with the cat and 1s with the dog.
df["category"] = df["category"].replace({0: 'cat', 1: 'dog'}) Step 10 – Split the data into train and validation.
train_df, validate_df = train_test_split(df, test_size=0.20, random_state=42)

train_df = train_df.reset_index(drop=True)
validate_df = validate_df.reset_index(drop=True)
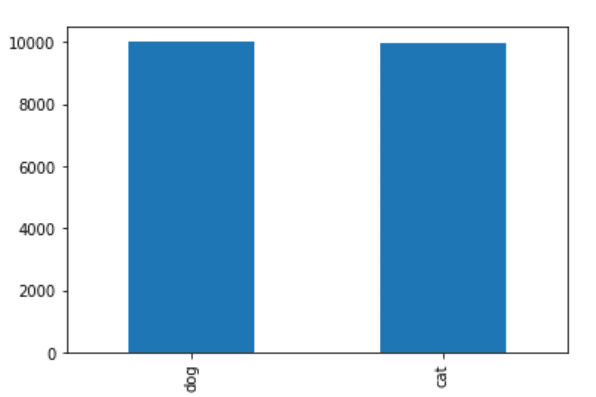
Step 11 – Counts of both categories in train data.
train_df['category'].value_counts().plot.bar()
- Both 0 and 1 have 10000 images each in the training dataset.
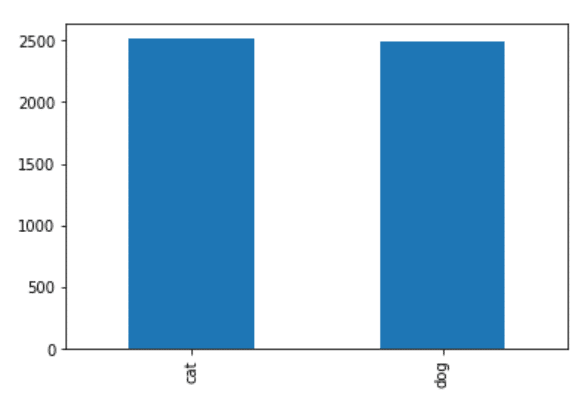
Step 12 – Counts of both categories in validation data.
validate_df['category'].value_counts().plot.bar()
- Both 0 and 1 have 2500 images each in the validation dataset.
Step 13 – Getting some shapes.
total_train = train_df.shape[0]
total_validate = validate_df.shape[0]
batch_size=15
- The first line gives us the no. of images in the training dataset.
- The second line gives us the no. of images in the validation dataset.
Step 14 – Augmenting training data of Cats and Dogs Classifier.
train_datagen = ImageDataGenerator(
    rotation_range=15,
    rescale=1./255,
    shear_range=0.1,
    zoom_range=0.2,
    horizontal_flip=True,
    width_shift_range=0.1,
    height_shift_range=0.1
)

train_generator = train_datagen.flow_from_dataframe(
    train_df,
    "train/",
    x_col='filename',
    y_col='category',
    target_size=IMAGE_SIZE,
    class_mode='categorical',
    batch_size=batch_size
)- Augmenting train data using ImageDataGenerator.

Step 15 – Augmenting validation data.
validation_datagen = ImageDataGenerator(rescale=1./255)

validation_generator = validation_datagen.flow_from_dataframe(
    validate_df,
    "train/",
    x_col='filename',
    y_col='category',
    target_size=IMAGE_SIZE,
    class_mode='categorical',
    batch_size=batch_size
)- Augmenting validation data using ImageDataGenerator.

Step 16 – Visualizing Augmentation on a random example image.
example_df = train_df.sample(n=1).reset_index(drop=True)

example_generator = train_datagen.flow_from_dataframe(
    example_df,
    "train/",
    x_col='filename',
    y_col='category',
    target_size=IMAGE_SIZE,
    class_mode='categorical'
)

plt.figure(figsize=(12, 12))
for i in range(0, 15):
    plt.subplot(5, 3, i+1)
    for X_batch, Y_batch in example_generator:
        image = X_batch[0]
        plt.imshow(image)
        break
plt.tight_layout()
plt.show()
Step 17 – Training and saving our Cats and Dogs Classifier model.
epochs = 50
history = model.fit_generator(
train_generator,
epochs=epochs,
validation_data=validation_generator,
validation_steps=total_validate//batch_size,
steps_per_epoch=total_train//batch_size,
callbacks=callbacks
)
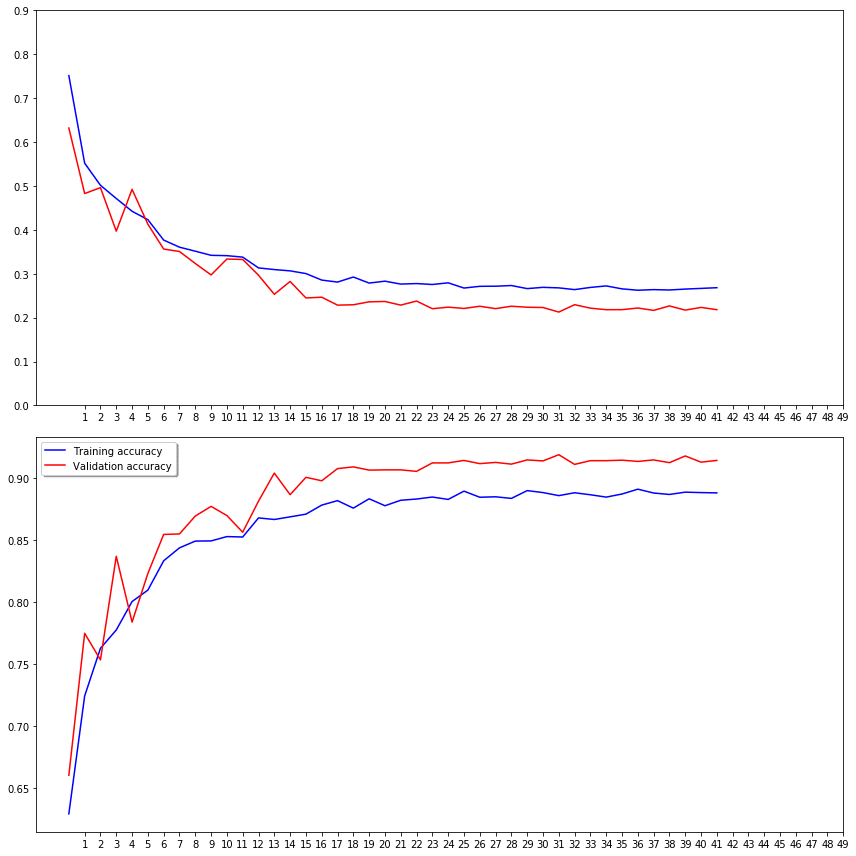
model.save("model.h5")Step 18 – Visualizing the training process.
fig, (ax1, ax2) = plt.subplots(1, 2, figsize=(12, 6))
ax1.plot(history.history['loss'], color='b', label="Training loss")
ax1.plot(history.history['val_loss'], color='r', label="validation loss")
ax1.set_xticks(np.arange(1, epochs, 1))
ax1.set_yticks(np.arange(0, 1, 0.1))

ax2.plot(history.history['accuracy'], color='b', label="Training accuracy")
ax2.plot(history.history['val_accuracy'], color='r',label="Validation accuracy")
ax2.set_xticks(np.arange(1, epochs, 1))

legend = plt.legend(loc='best', shadow=True)
plt.tight_layout()
plt.show()
Step 19 – Live predictions of Cats and Dogs Classifier.
for i in range(10):
    all_test_images = os.listdir('test')
    random_image = random.choice(all_test_images)
    img = cv2.imread(f'test/{random_image}')
    img = cv2.resize(img,(IMAGE_HEIGHT,IMAGE_WIDTH))

    org = img.copy()
    img = img.reshape(1,128,128,3)

    pred = model.predict(img)
    print(['cat','dog'][int(pred[0][0])])
    cv2.imshow('Live predictions',org)
    cv2.waitKey(0)
cv2.destroyAllWindows()- Randomly take out 10 images from test folder and make predictions on them.
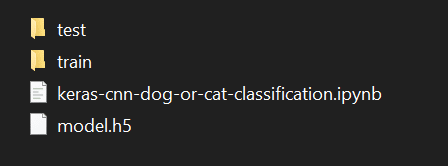
Folders hierarchy…
Download the Source Code and Data
Download Source Code…
Download Train Data…
Download Test Data…
Do let me know if there’s any query regarding Cats and Dogs Classifier by contacting me on email or LinkedIn.
So this is all for this blog folks, thanks for reading it and I hope you are taking something with you after reading this and till the next time ?…
Read my previous post: DIMENSIONALITY REDUCTION USING AUTOENCODERS
Check out my other machine learning projects, deep learning projects, computer vision projects, NLP projects, Flask projects at machinelearningprojects.net.
