So, in today’s blog, we will see that how we can perform morphological operations like erosion, dilation, and gradient upon an image to enhance it.
Morphological transformations are some simple operations based on the image shape. It is normally performed on binary images. It needs two inputs, one is our original image, and the second one is called structuring element or kernel which decides the nature of the operation. Two basic morphological operators are Erosion and Dilation. Then its variant forms like Opening, Closing, Gradient, etc also come into play.
This is going to be a very interesting and informative blog, so without any further due, Let’s do it…
Step 1 – Importing required libraries.
import cv2
import numpy as np
import matplotlib.pyplot as plt
Step 2 – Load the image.
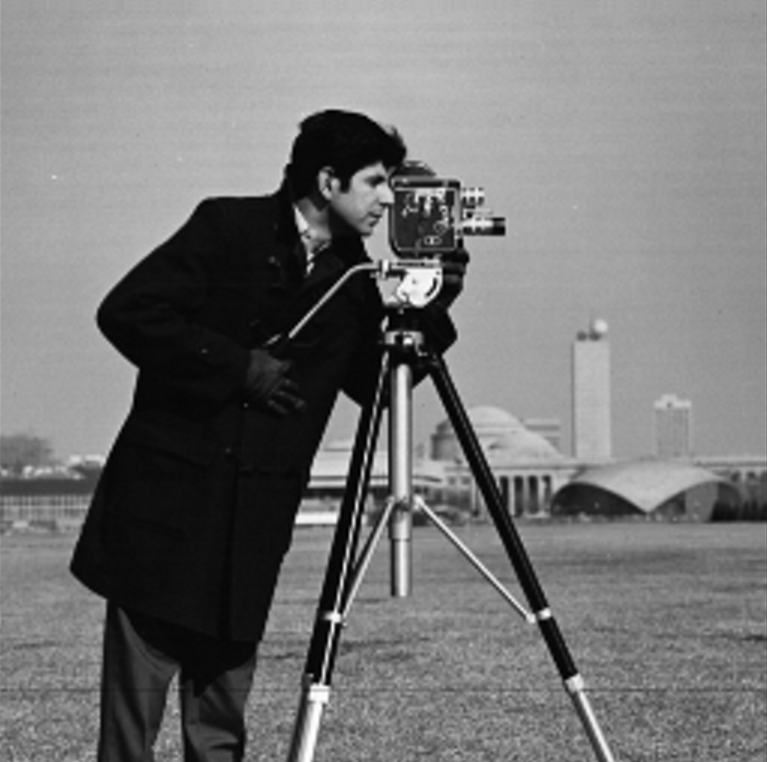
imgpath = "cameraman.tif"
img = cv2.imread(imgpath, 0)
Step 3 – Let’s make a kernel.
k = np.ones((5, 5), np.uint8)
- Here we are creating a kernel which is a matrix of shape 5X5 having all the elements as 1s.
- We will be using this kernel for performing all the 3 morphological operations.
Step 4 – Perform the first morphological operation – Erosion.
Syntax: cv2.erode(src, kernel[, dst[, anchor[, iterations[, borderType[, borderValue]]]]])
Parameters:
| src | It is the image that is to be eroded. |
| kernel | A structuring element used for erosion. If element = Mat(), a 3 x 3 rectangular structuring element is used. The kernel can be created using getStructuringElement. |
| dst | It is the output image of the same size and type as src. |
| anchor | It is a variable of type integer representing anchor point and its default value Point is (-1, -1) which means that the anchor is at the kernel center. |
| borderType | It depicts what kind of border to be added. It is defined by flags like cv2.BORDER_CONSTANT, cv2.BORDER_REFLECT, etc. |
| iterations | It is the number of times erosion is applied. |
| borderValue | It is border value in case of a constant border. |
erosion = cv2.erode(img, k, iterations=2)
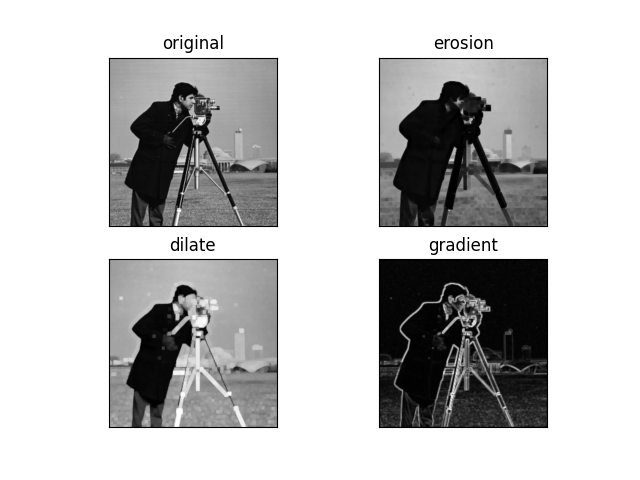
- The basic idea of erosion is just like soil erosion only, it erodes away the boundaries of the foreground object (Always try to keep foreground in white).
- In Layman’s terms, it degrades the boundaries of the objects present in the image.
- So what does it do? The kernel slides through the image (as in 2D convolution).
- A pixel in the original image (either 1 or 0) will be considered 1 only if all the pixels under the kernel are 1, otherwise, it is eroded (made to zero).
Step 5 – Perform the second morphological operation – Dilation.
Syntax: cv2.dilate(src, kernel[, anchor[, iterations[, borderType[, borderValue]]]])
Parameters:
| src | It is a required parameter and an original image on which we need to perform dilation. |
| kernel | It is the required parameter is the matrix with which the image is convolved. |
| dst | It is the output image of the same size and type as image src. |
| anchor | It is a variable of type integer representing the anchor point and its default value Point is (-1, -1) which means that the anchor is at the kernel center. |
| borderType | It depicts what kind of border to be added. It is defined by flags like cv2.BORDER_CONSTANT, cv2.BORDER_REFLECT, etc. |
| iterations | It is an optional parameter that takes several iterations. |
| borderValue | It is border value in case of a constant border. |
dilation = cv2.dilate(img, k, iterations=2)
- It is just the opposite of erosion. Here, a pixel element is ‘1’ if at least one pixel under the kernel is ‘1’.
- In Layman’s terms, it enhances the boundaries of the objects present in the image.
- So it increases the white region in the image or the size of the foreground object increases.
- Normally, in cases like noise removal, erosion is followed by dilation.
- Because, erosion removes white noises, but it also shrinks our objects. So we dilate it.
- Since noise is gone, they won’t come back, but our object area increases.
- It is also useful in joining broken parts of an object.
Step 6 – Perform the third morphological operation – Gradient.
gradient = cv2.morphologyEx(img, cv2.MORPH_GRADIENT, k)
- As we know that gradient basically checks for the lines or edges where there is an abrupt change in color whether it’s a white-to-black or black-to-white change and marks that as a white pixel.
- That’s what is happening here also, you can refer to the image below.
Step 7- Finally let’s plot the results of morphological operations.
titles = ['original', 'erosion', 'dilate', 'gradient']
img = [img, erosion, dilation, gradient]

for i in range(4):
    plt.subplot(2, 2, i+1)
    plt.xticks([])
    plt.yticks([])
    plt.title(titles[i])
    plt.imshow(img[i], cmap='gray')
plt.show()
Let’s see the whole code of morphological operations…
# morphological operations
import cv2
import numpy as np
import matplotlib.pyplot as plt

imgpath = "cameraman.tif"
img = cv2.imread(imgpath, 0)

k = np.ones((5, 5), np.uint8)

erosion = cv2.erode(img, k, iterations=2)
dilation = cv2.dilate(img, k, iterations=2)
gradient = cv2.morphologyEx(img, cv2.MORPH_GRADIENT, k)

titles = ['original', 'erosion', 'dilate', 'gradient']
img = [img, erosion, dilation, gradient]

for i in range(4):
    plt.subplot(2, 2, i+1)
    plt.xticks([])
    plt.yticks([])
    plt.title(titles[i])
    plt.imshow(img[i], cmap='gray')

plt.show()
NOTE – You can read more about the morphological operations at the official OpenCV documentation.
Do let me know if there’s any query regarding morphological operations by contacting me by email or LinkedIn.
So this is all for this blog folks, thanks for reading it and I hope you are taking something with you after reading this and till the next time ?…
Read my previous post: HOW TO USE MOUSE CLICKS TO DRAW CIRCLES IN PYTHON USING OPENCV
Check out my other machine learning projects, deep learning projects, computer vision projects, NLP projects, Flask projects at machinelearningprojects.net.