Hey guys in this blog we will see the Easiest way to train YOLONAS on the custom dataset.
This is going to be a very interesting blog so without any further due, let’s do it…
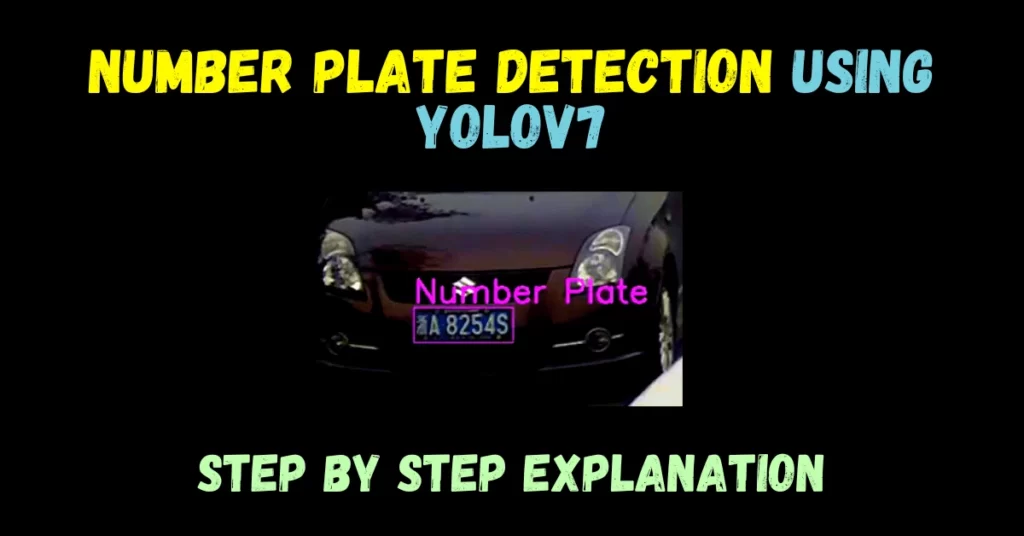
Sneak Peek at our Output
A bit about YOLONAS
- YOLO-NAS (You Only Look Once – Neural Architecture Search) is a state-of-the-art object detection model developed by Deci.
- It is based on the YOLO architecture, but it uses neural architecture search (NAS) to find the optimal model architecture for a given dataset.
- NAS is a technique that automatically searches for the best model architecture for a given task. This can be a computationally expensive process, but it can lead to significant improvements in model performance.
- YOLO-NAS has been shown to outperform other YOLO models on a number of benchmark datasets, including COCO and ImageNet. It is also relatively fast and efficient, making it suitable for real-time applications.
- YOLO-NAS is available as an open-source project, and it can be trained and deployed using the SuperGradients Python package.
Here are some of the key features of YOLO-NAS:
- State-of-the-art object detection performance
- Fast and efficient inference
- Scalable to different datasets and tasks
- Open source and easy to use
YOLO-NAS can be used for a variety of object detection tasks, such as:
- Self-driving cars
- Surveillance systems
- Robotics
- Medical imaging
- Manufacturing
If you are looking for a state-of-the-art object detection model that is fast, efficient, and scalable, YOLO-NAS is a great option to consider.
Now let’s train YOLONAS on the custom dataset…
Step 0 – Prepare custom data
- Create a folder called data.
- Create 3 folders inside data; train, val, and test.
- All train, val, and test will have 2 folders inside them; images and labels.
- I took 50 frames out of the video, annotated them, and splitted them between these 3 folders.
- If you also want to annotate your data refer to this blog – https://machinelearningprojects.net/annotate-data-with-bounding-boxes/
- Now open your Google Drive, create a folder called ‘YOLO_NAS_Training‘, and upload the data folder inside this folder.
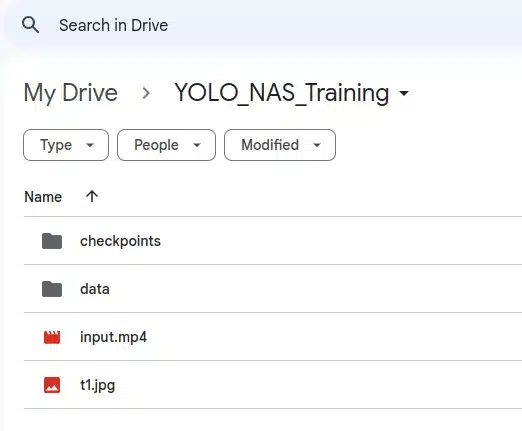
- t1.jpg is an image and input.mp4 is a video on which I will test my final model.
- Ignore the checkpoints folder here, it will be created when we start the training.
Step 1 – Open Google Collab
- Custom training YOLO NAS requires some serious resources, so for the sake of this, we will use Google Collab.
- Open a new Notebook and start following the following steps…
Step 2 – Installing required libraries
- In this step, we will install 2 libraries; torch and super-gradients.
!pip install torch
!pip install super-gradients
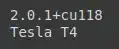
import torch

from super_gradients.training import Trainer
from super_gradients.training import models
from super_gradients.training import dataloaders
from super_gradients.training.losses import PPYoloELoss
from super_gradients.training.metrics import DetectionMetrics_050
from super_gradients.training.models.detection_models.pp_yolo_e import PPYoloEPostPredictionCallback
from super_gradients.training.dataloaders.dataloaders import coco_detection_yolo_format_train, coco_detection_yolo_format_val

print(torch.__version__)
print(torch.cuda.get_device_name(0))
Step 3 – Let’s connect to Google Drive
- We will connect Google Drive with our Google Collab.
- We are doing this because Google Collab doesn’t have a fixed memory.
- As soon as we shut down the runtime, all our files including the trained models will be lost.
from google.colab import drive
drive.mount('/content/drive')
Step 4 – Let’s define a Trainer
- The first thing you need to define in SuperGradients is the Trainer.
- The trainer is in charge of training, evaluation, saving checkpoints, etc.
- We need to pass 2 arguments to it:
- ckpt_root_dir – this is the directory where results from all your experiments will be saved
- experiment_name – all checkpoints, logs, and tensorboards will be saved in a directory with the name you specify here.
parentpath = '/content/drive/MyDrive/YOLO_NAS_Training/'

trainer = Trainer(experiment_name='my_first_yolonas_run', ckpt_root_dir=parentpath+'checkpoints')
Step 5 – Defining data paths
- You’ll need to load your dataset parameters into a dictionary, specifically defining:
- data_dir: path to the parent directory where your data lives.
- train_images_dir: Path to the training images folder.
- train_labels_dir: Path to the training labels folder.
- val_images_dir: Path to the val images folder.
- val_labels_dir: Path to the val labels folder.
- test_images_dir: Path to the test images folder.
- test_labels_dir: Path to the test labels folder.
- classes: list of classes
params = {
    'data_dir':parentpath+'data/',
    'train_images_dir':parentpath+'data/train/images',
    'train_labels_dir':parentpath+'data/train/labels',
    'val_images_dir':parentpath+'data/val/images',
    'val_labels_dir':parentpath+'data/val/labels',
    'test_images_dir':parentpath+'data/test/images',
    'test_labels_dir':parentpath+'data/test/labels',
    'classes': ['number_plate']
}
Step 6 – Let’s Create Data
- In this step, we are creating training dataloaders, validation dataloaders, and test dataloaders.
- We need to pass 2 dictionaries to each dataloader. One is dataset_params and the other is dataloader_parms.
- Dataset Parameters take 4 parameters; data_dir, images_dir, labels_dir, classes. We have defined these in the step above.
- Dataloader Parameters take 2 parameters.
- batch_size: We are setting it to 16.
- num_workers: This specifies the number of workers. We are setting it to 2.
train_data = coco_detection_yolo_format_train(
    dataset_params={
        'data_dir': params['data_dir'],
        'images_dir': params['train_images_dir'],
        'labels_dir': params['train_labels_dir'],
        'classes': params['classes']
    },
    dataloader_params={
        'batch_size':16,
        'num_workers':2
    }
)

val_data = coco_detection_yolo_format_val(
    dataset_params={
        'data_dir': params['data_dir'],
        'images_dir': params['val_images_dir'],
        'labels_dir': params['val_labels_dir'],
        'classes': params['classes']
    },
    dataloader_params={
        'batch_size':16,
        'num_workers':2
    }
)

test_data = coco_detection_yolo_format_val(
    dataset_params={
        'data_dir': params['data_dir'],
        'images_dir': params['test_images_dir'],
        'labels_dir': params['test_labels_dir'],
        'classes': params['classes']
    },
    dataloader_params={
        'batch_size':16,
        'num_workers':2
    }
)

Step 7 – See Transformations
- It automatically adds transforms to our data.
- Let’s see what all transforms are automatically added to our training data.
train_data.dataset.dataset_params['transforms'][1]

- Here is a list of all the transformations automatically applied to our data.
- Let’s try to change 1 of them.
train_data.dataset.dataset_params['transforms'][1]['DetectionRandomAffine']['degrees'] = 11.23
- In the line of code above we have changed the ‘degrees‘ parameter from 10.42 to 11.23.
- Now let’s plot a batch of our training data.
train_data.dataset.plot()
- And following is a batch of 16 images with transformations applied.
- You can notice the number_plates marked in the images.

Step 8 – Defining a YOLONAS model
- In this step, we are downloading a pre-trained YOLONAS model.
- Note we are downloading the ‘yolo_nas_s‘ model which means the small version of YOLONAS.
- We are downloading weights that were trained on the ‘coco‘ dataset.
model = models.get('yolo_nas_s',
                   num_classes=len(dataset_params['classes']),
                   pretrained_weights="coco"
                   )

Step 9 – Defining Training Parameters
There are a few mandatory arguments that you must define for training params:
- max_epochs – Max number of training epochs
- loss – the loss function you want to use
- optimizer – Optimizer you will be using. You can choose from a variety of
optimizer‘s such as: Adam, AdamW, SGD, Lion, or RMSProps. If you choose to change the default parameters of these optimizers you pass them into optimizer_params. - train_metrics_list – Metrics to log during training
- valid_metrics_list – Metrics to log during training
- metric_to_watch – metric which the model checkpoint will be saved according to
SuperGradients has native integrations with Tensorboard, Weights and Biases, ClearML, and DagsHub.
train_params = {
    # ENABLING SILENT MODE
    'silent_mode': True,
    "average_best_models":True,
    "warmup_mode": "linear_epoch_step",
    "warmup_initial_lr": 1e-6,
    "lr_warmup_epochs": 3,
    "initial_lr": 5e-4,
    "lr_mode": "cosine",
    "cosine_final_lr_ratio": 0.1,
    "optimizer": "Adam",
    "optimizer_params": {"weight_decay": 0.0001},
    "zero_weight_decay_on_bias_and_bn": True,
    "ema": True,
    "ema_params": {"decay": 0.9, "decay_type": "threshold"},

    # TRAINING FOR 100 EPOCHS FOR THIS EXAMPLE NOTEBOOK
    "max_epochs": 100,
    "mixed_precision": True,
    "loss": PPYoloELoss(
        use_static_assigner=False,
        # NOTE: num_classes needs to be defined here
        num_classes=len(params['classes']),
        reg_max=16
    ),

    "valid_metrics_list": [
        DetectionMetrics_050(
            score_thres=0.1,
            top_k_predictions=300,
            # NOTE: num_classes needs to be defined here
            num_cls=len(params['classes']),
            normalize_targets=True,
            post_prediction_callback=PPYoloEPostPredictionCallback(
                score_threshold=0.01,
                nms_top_k=1000,
                max_predictions=300,
                nms_threshold=0.7
            )
        )
    ],
    "metric_to_watch": 'mAP@0.50'
}
Step 10 – Let’s Train YOLONAS on the custom Dataset
- And it’s finally time to train our model.
- It will take 4 parameters:
- model: we defined the model in the above step where we imported the smaller version of YOLONAS.
- training_params: This dictionary we defined above contains all the training configurations.
- And finally, it will take training dataloader and validation dataloader.
trainer.train(model=model,
              training_params=train_params,
              train_loader=train_data,
              valid_loader=val_data)
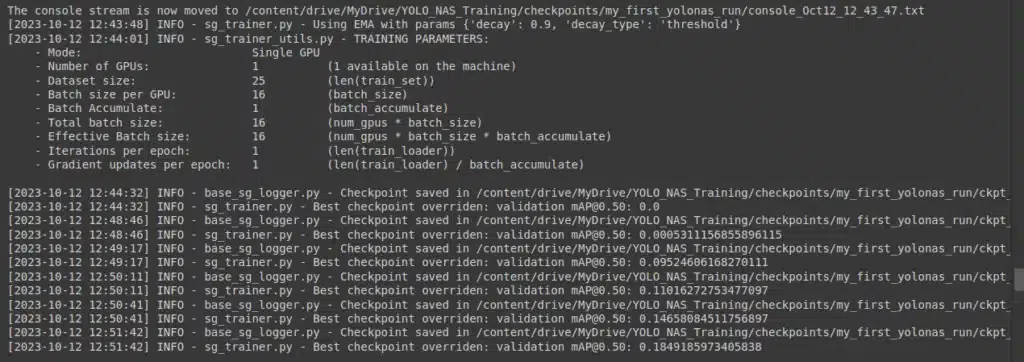
- While the training is going on you will see files like below in the checkpoints folder.
- ckpt_latest.pth: This is the path to the latest model.
- ckpt_best.pth: This is the path to the best model.

Step 11 – Let’s pick the best model
- In this step, we are just picking up the best model from our checkpoints folder.
best_model = models.get('yolo_nas_s',
                        num_classes=len(dataset_params['classes']),
checkpoint_path=parentpath+"checkpoints/my_first_yolonas_run/ckpt_best.pth")

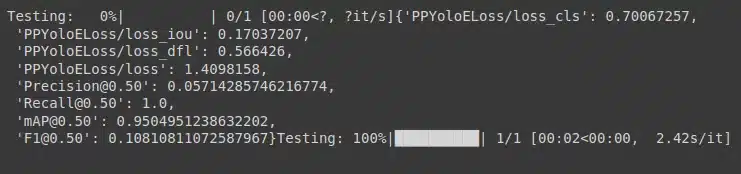
Step 12 – Let’s test our model
trainer.test(model=best_model,
            test_loader=test_data,
            test_metrics_list=DetectionMetrics_050(score_thres=0.1,
                                                   top_k_predictions=300,
                                                   num_cls=len(dataset_params['classes']),
                                                   normalize_targets=True,
                                                   post_prediction_callback=PPYoloEPostPredictionCallback(score_threshold=0.01,
                                                                                                          nms_top_k=1000,
                                                                                                          max_predictions=300,
                                                                                                          nms_threshold=0.7)
                                                  ))
Step 13 – Take predictions on an Image
test_image = parentpath+'t1.jpg'
best_model.predict(test_image).show()

Step 14 – Take predictions on a Video
- resize_video() is a utility function that is used to resize the video.
- I have used this function to resize my video to 1280X720 dimensions.
- I have done this step because my video was very big in size and it was continuously crashing my program.
def resize_video(invidpath,outpath,new_width,new_height):
  import cv2

  # Open the video file
  video_capture = cv2.VideoCapture(invidpath)

  # Get the current frames per second and frame size
  fps = int(video_capture.get(cv2.CAP_PROP_FPS))
  frame_width = int(video_capture.get(cv2.CAP_PROP_FRAME_WIDTH))
  frame_height = int(video_capture.get(cv2.CAP_PROP_FRAME_HEIGHT))

  # Define the codec and create a VideoWriter object to save the resized video
  fourcc = cv2.VideoWriter_fourcc(*'XVID')  # You can choose a different codec if needed
  out = cv2.VideoWriter(outpath, fourcc, fps, (new_width, new_height))  # Set new_width and new_height to your desired dimensions

  while True:
      ret, frame = video_capture.read()
      if not ret:
          break  # Break the loop when the video ends

      # Resize the frame
      new_frame = cv2.resize(frame, (new_width, new_height))

      # Write the resized frame to the output video
      out.write(new_frame)

  # Release the video objects
  video_capture.release()
  out.release()

  # Close all OpenCV windows
  cv2.destroyAllWindows()

resize_video(parentpath+"input.mp4",parentpath+"resized_input.mp4",1280,720)
- Let’s make predictions on the video and save it as result.mp4.
device = 0 if torch.cuda.is_available() else "cpu"

input_video_path = parentpath+"resized_input.mp4"
output_video_path = parentpath+"result.mp4"


best_model.to(device).predict(input_video_path).save(output_video_path)
Inference on Video
Conclusion
Training YOLO on a custom dataset can be computationally intensive and may require a dedicated GPU. Additionally, it’s essential to ensure that your dataset is diverse and representative of the objects you want to detect. The exact steps and tools you use may vary depending on the specific YOLO version and deep learning framework you choose.
So in this way, you can train YOLONAS on the custom dataset. This was all for this blog guys, hope you enjoyed it…
FAQ
What is YOLO-NAS?
YOLO-NAS is a state-of-the-art object detection model developed by Deci. It is based on the YOLO architecture, but it uses neural architecture search (NAS) to find the optimal model architecture for a given dataset.
Why should I train YOLO-NAS on a custom dataset?
Training YOLO-NAS on a custom dataset can improve its performance on your specific task. This is because the model will be able to learn the unique features of your dataset.
What do I need to train YOLO-NAS on a custom dataset?
To train YOLO-NAS on a custom dataset, you will need:
– A custom dataset with labeled images.
– A pre-trained YOLO-NAS model.
– The SuperGradients Python package.
How do I prepare my custom dataset?
Your custom dataset should be in the COCO format. This means that each image should have a corresponding annotation file in JSON format. The annotation file should contain the bounding boxes and class labels for all of the objects in the image.
How do I load the pre-trained YOLO-NAS model?
You can download pre-trained YOLO-NAS models from the SuperGradients website.
How do I deploy the model?
Once you are satisfied with the performance of the model, you can deploy it to production. There are a number of different ways to deploy a YOLO-NAS model, such as using a web service or a mobile app.
What are some tips for training YOLO-NAS on a custom dataset?
Here are some tips for training YOLO-NAS on a custom dataset:
– Use a large and diverse dataset. The more data you have, the better the model will generalize to new data.
– Use data augmentation. Data augmentation techniques can help to improve the performance of the model by generating new training data from existing data.
– Use a GPU. GPUs can significantly accelerate the training process.
– Experiment with different hyperparameters. The hyperparameters of the model can have a big impact on its performance. It is important to experiment with different hyperparameters to find the best values for your dataset.
Read my last article – Easiest way to Download Data from the Open Image Dataset
Check out my other machine learning projects, deep learning projects, computer vision projects, NLP projects, Flask projects at machinelearningprojects.net


can i modify you object detection model to car identification in the image.
Yes, you can…