Hey guys in today’s article we will see some Best Final Year Python Projects with source codes. This is going to be a very interesting blog, so without any further due, let’s do it…
Best Final Year Python Projects
HealthCure – Medical Project – 7 disease Detections
HealthCure is an all-in-one medical solution. We know the future is all about AI so here is my idea of bringing 7 disease detections under one platform using the power of AI. Although these results are perfect yet an experiment we did, which can prove to be a revolution in the coming years.
7 disease detections:
- Covid-19 Detection
- Brain Tumour Detection
- Breast Cancer Detection
- Alzheimer Detection
- Diabetes Detection
- Pneumonia Detection
- Heart Disease Detection
All Disease Detections…
Covid-19 Detection
- Used custom-made CNN architecture for this detection.
- The accuracy achieved was around 93%.
Main Page

Results

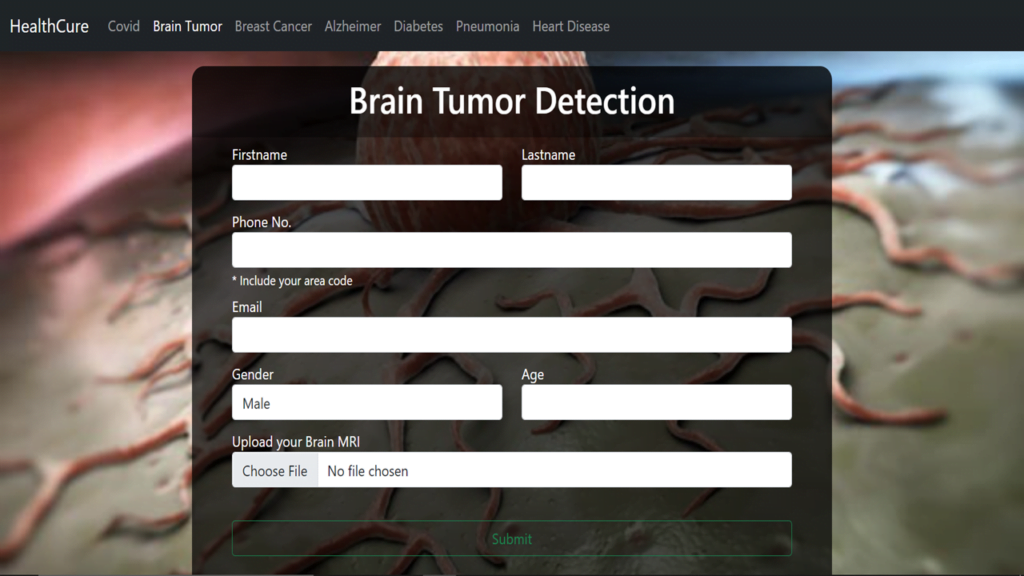
Brain Tumour detection
- Used VGG-16 for feature extraction.
- Used custom-made CNN ahead of CNN.
- The accuracy achieved was around 100% ?(just tested on 10 images).
Main Page
Result Page

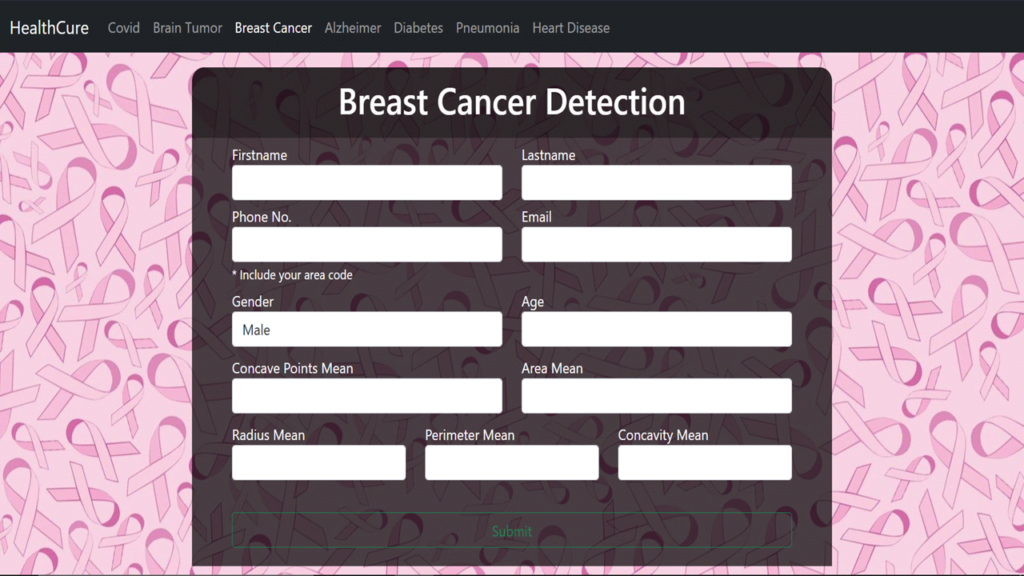
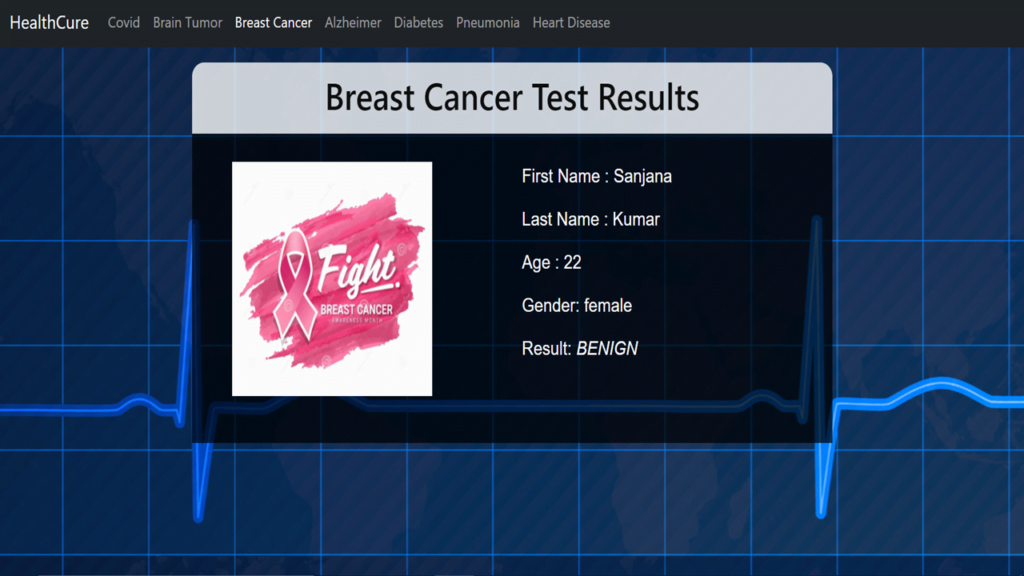
Breast Cancer Detection
- Used Random Forest for this use case.
- The accuracy achieved was around 91.81%.
Main Page
Result Page
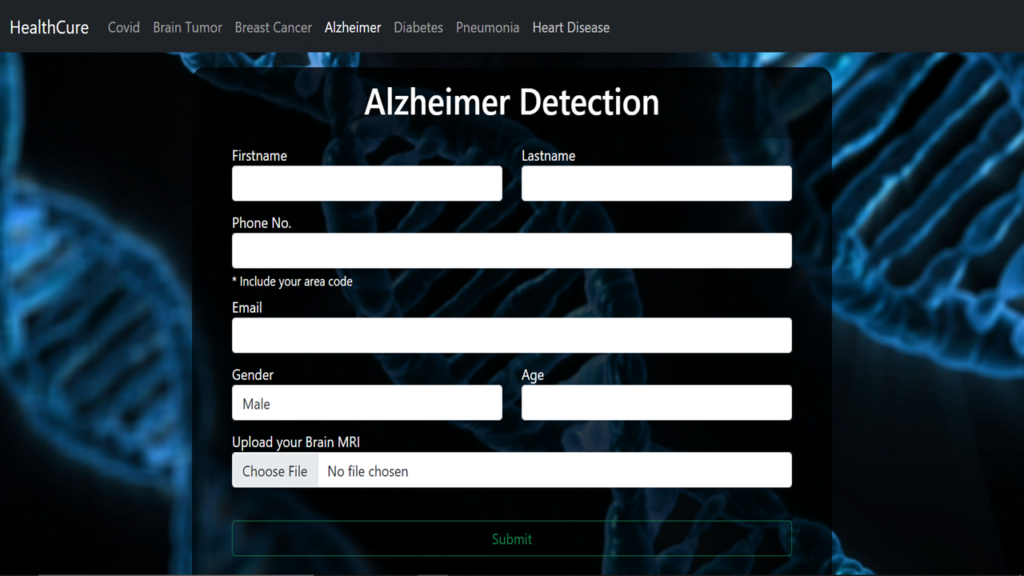
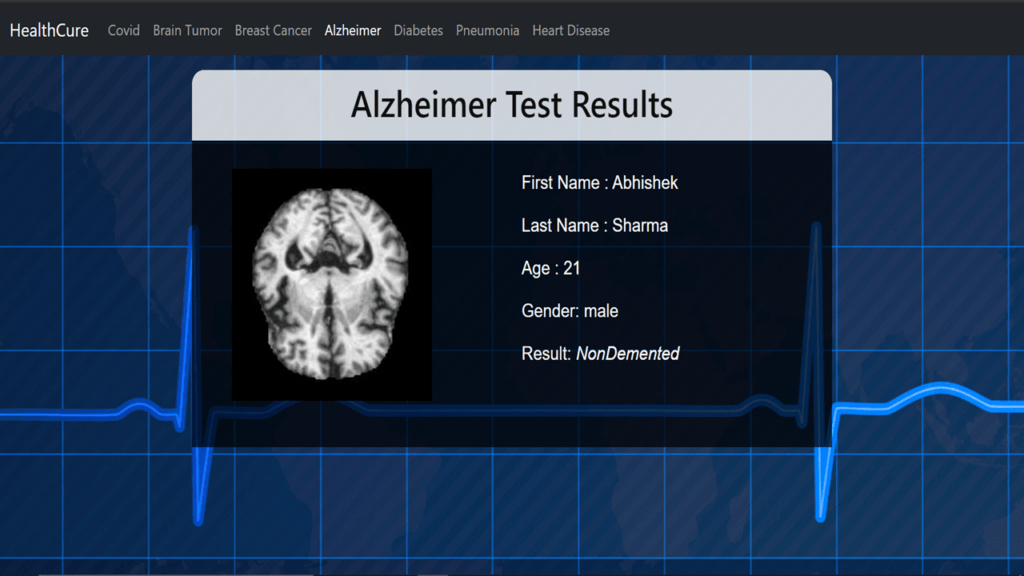
Alzheimer Detection
- Trained CNN architecture for this use case.
- The accuracy achieved was around 73.54%.
Main Page
Result Page
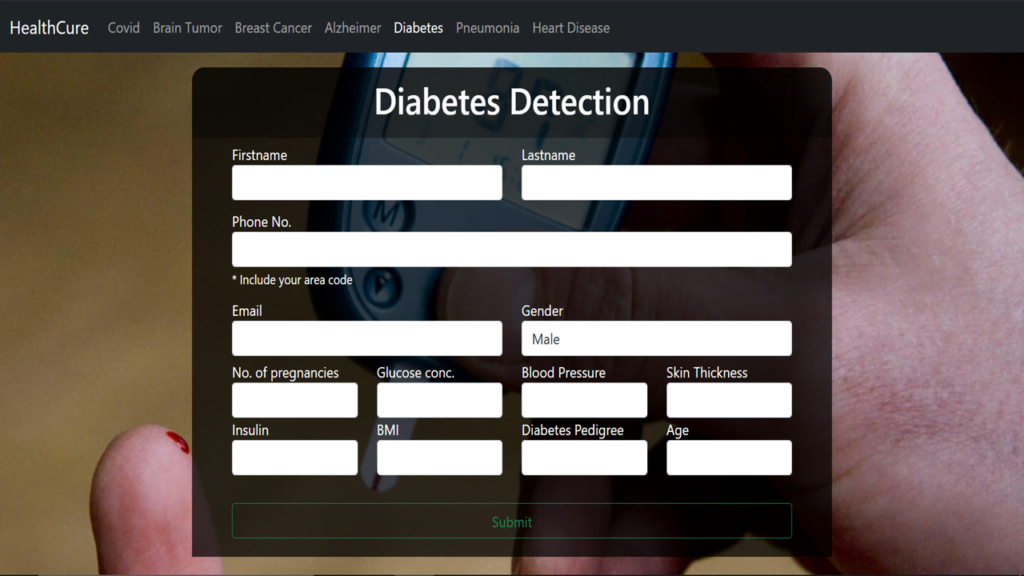
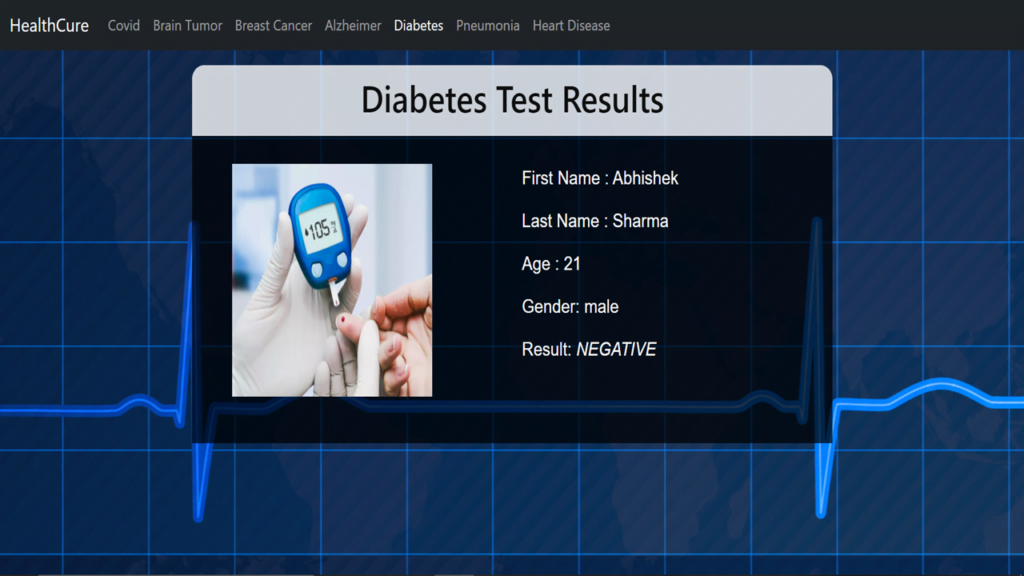
Diabetes detection
- Used Random Forest for this use case.
- The accuracy achieved was around 66.8%.
Main Page
Result Page
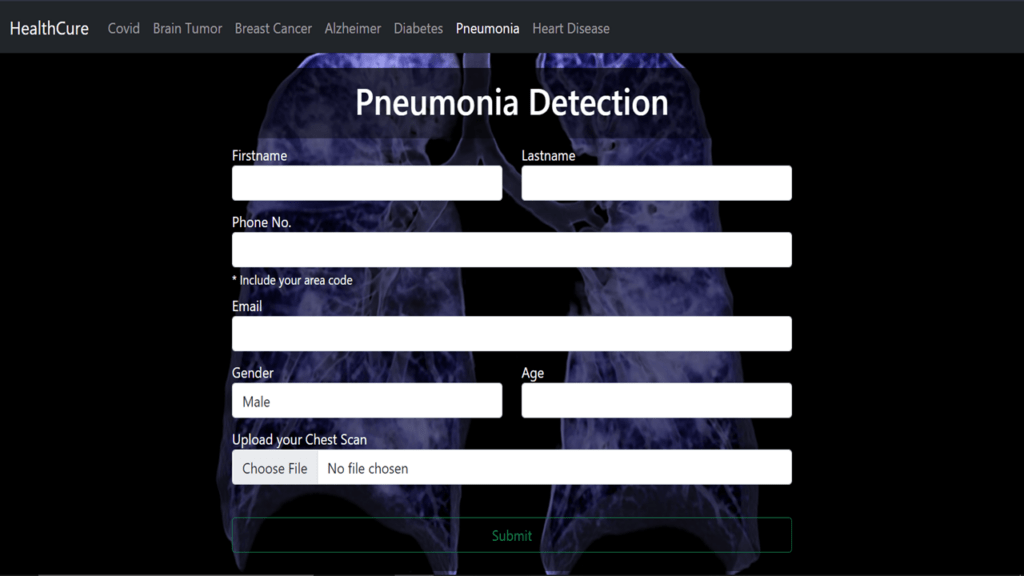
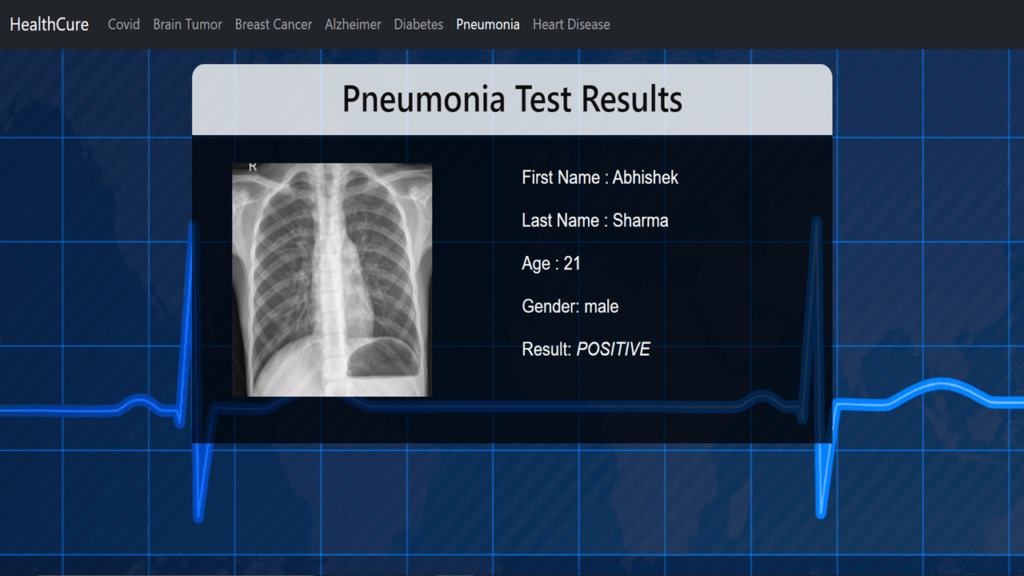
Pneumonia Detection
- Used custom CNN architecture for this use case.
- The accuracy achieved was around 83.17%.
Main Page
Result Page
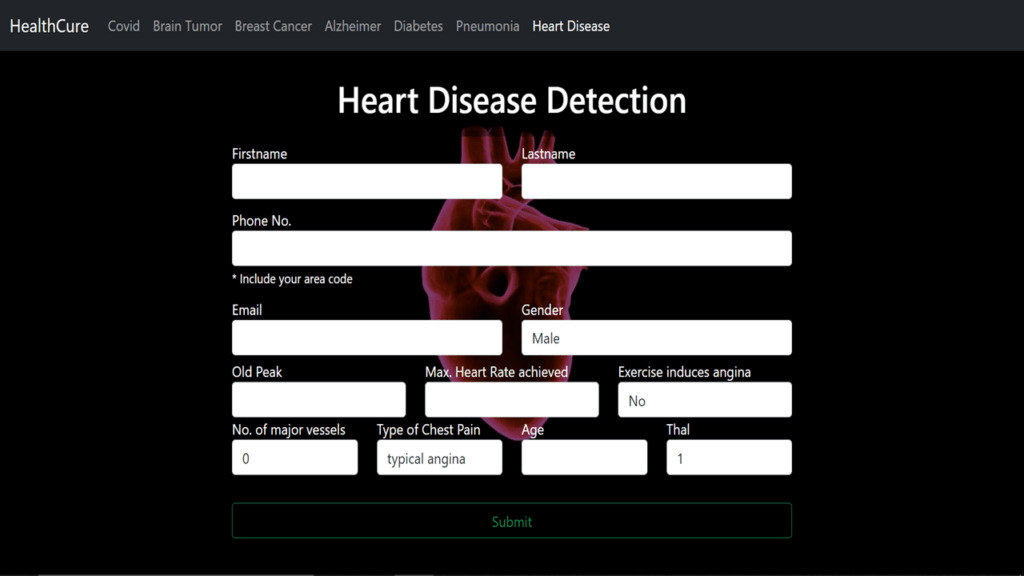
Heart Disease Detection
- Used XGBoost for this use case.
- The accuracy achieved was around 86.96%.
Main Page
Result Page

Future Scope…
- As time passes, we will be available with more and more data and we will try to make our models even more accurate by training on much more data.
- Also, we will be adding more disease detections that can be detected using X-ray scans or just by inputting simple numbers.
- We are also planning to add more features like if a person is found positive then our app will show him what precautions he needs to take and how he can cure himself.
- We will also be storing the detection records.
- So these are some future improvements/additions we plan to add.
How to run the project
Checkout the video tutorial here – https://youtu.be/psaMKTPdgIo
Download the app from here
Create a conda environment and install the required libraries
conda create -n healthcure python=3.9.13
conda activate healthcure
pip install opencv-python==4.5.1.48 numpy tensorflow==2.12.0 scikit-learn==0.24.2 imutils==0.5.4 flask==3.0.0 xgboost==2.0.3
When you have successfully created the environment, installed the required libraries, and activated it, simply run the following command in the terminal.
flask run
About Training Code, PPT, and Project Report…
Also, I am getting a very high number of requests for Training Files, PPT, and Project reports. So I have finally decided to share those with the people who are in real need. But as you know quality doesn’t come for free…
So, If you are really interested and want all the resources which include Training Code + App + PPT + Project Report, you have to pay a minimalistic fee of ₹500 and send me the payment screenshot at asharma70420@gmail.com.
You can Pay using the button below…
Face Recognition Based Attendance System
So guys here comes the most awaited project of machine learning Face Recognition based Attendance System. As the name says this project takes attendance using biometrics (in this case face) and is one of the most famous projects among college students out there.
I have tried to make the project the easiest way possible. So without any further due, Let’s do it…
How do Face Recognition based Attendance Systems Work?
- Face recognition technology involves analyzing and identifying a person’s facial features using advanced algorithms.
- It captures and compares unique facial characteristics, such as the distance between the eyes, the shape of the nose, and the contours of the face.
- This technology has come a long way and is now capable of near-instantaneous recognition with remarkable accuracy.
- They use a camera to capture an individual’s face, analyze the facial features, and compare them with a database of pre-registered faces.
- If a match is found, attendance is recorded. These systems can also adapt to variations in lighting, facial expressions, and aging, ensuring reliability.
Snapshots of our App
Home Page
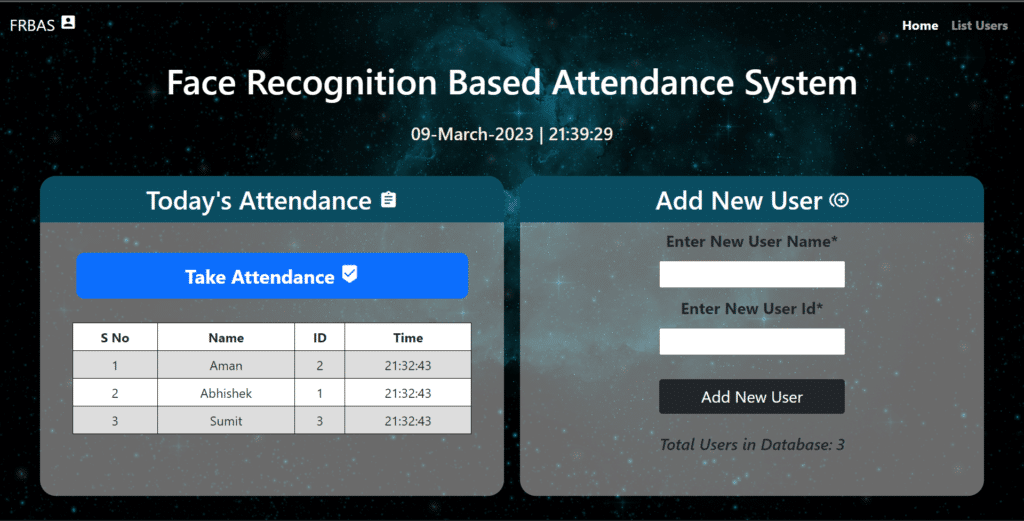
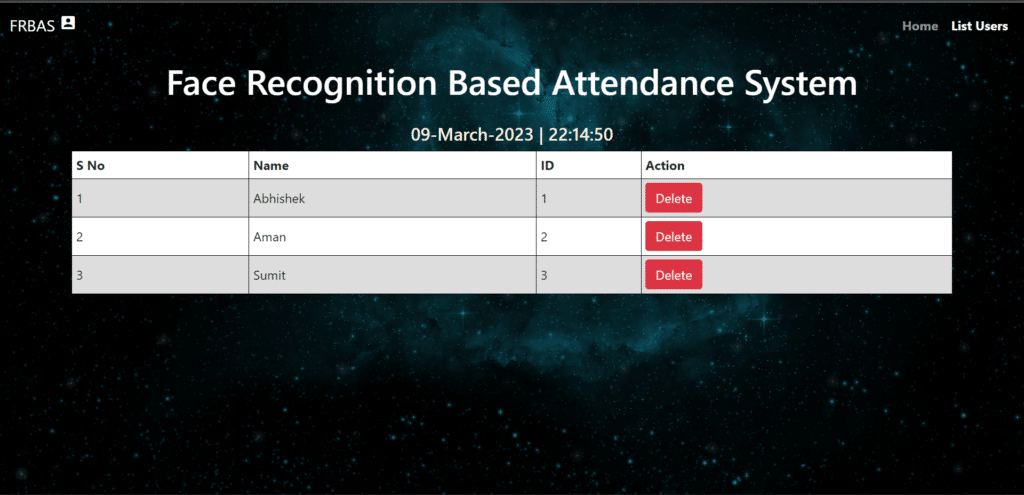
List Users Page
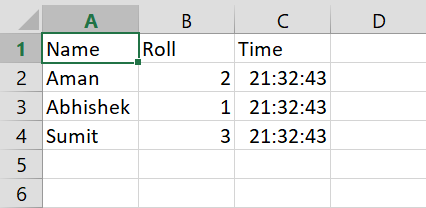
Attendance Sheet
Code Walkthrough of Face Recognition Based Attendance System
app.py
# Face Recognition based Attendance System
# Best Final Year Python Projects

import cv2
import os
from flask import Flask, request, render_template
from datetime import date
from datetime import datetime
import numpy as np
from sklearn.neighbors import KNeighborsClassifier
import pandas as pd
import joblib

# Defining Flask App
app = Flask(__name__)

# Number of images to take for each user
nimgs = 10

# Saving Date today in 2 different formats
datetoday = date.today().strftime("%m_%d_%y")


# Initializing VideoCapture object to access WebCam
face_detector = cv2.CascadeClassifier('haarcascade_frontalface_default.xml')


# If these directories don't exist, create them
if not os.path.isdir('Attendance'):
    os.makedirs('Attendance')
if not os.path.isdir('static'):
    os.makedirs('static')
if not os.path.isdir('static/faces'):
    os.makedirs('static/faces')
if f'Attendance-{datetoday}.csv' not in os.listdir('Attendance'):
    with open(f'Attendance/Attendance-{datetoday}.csv', 'w') as f:
        f.write('Name,Roll,Time')


# get a number of total registered users
def totalreg():
    return len(os.listdir('static/faces'))


# extract the face from an image
def extract_faces(img):
    if img != []:
        gray = cv2.cvtColor(img, cv2.COLOR_BGR2GRAY)
        face_points = face_detector.detectMultiScale(
            gray, 1.2, 5, minSize=(20, 20))
        return face_points
    else:
        return []


# Identify face using ML model
def identify_face(facearray):
    model = joblib.load('static/face_recognition_model.pkl')
    return model.predict(facearray)


# A function which trains the model on all the faces available in faces folder
def train_model():
    faces = []
    labels = []
    userlist = os.listdir('static/faces')
    for user in userlist:
        for imgname in os.listdir(f'static/faces/{user}'):
            img = cv2.imread(f'static/faces/{user}/{imgname}')
            resized_face = cv2.resize(img, (50, 50))
            faces.append(resized_face.ravel())
            labels.append(user)
    faces = np.array(faces)
    knn = KNeighborsClassifier(n_neighbors=5)
    knn.fit(faces, labels)
    joblib.dump(knn, 'static/face_recognition_model.pkl')


# Extract info from today's attendance file in attendance folder
def extract_attendance():
    df = pd.read_csv(f'Attendance/Attendance-{datetoday}.csv')
    names = df['Name']
    rolls = df['Roll']
    times = df['Time']
    l = len(df)
    return names, rolls, times, l


# Add Attendance of a specific user
def add_attendance(name):
    username = name.split('_')[0]
    userid = name.split('_')[1]
    current_time = datetime.now().strftime("%H:%M:%S")

    df = pd.read_csv(f'Attendance/Attendance-{datetoday}.csv')
    if int(userid) not in list(df['Roll']):
        with open(f'Attendance/Attendance-{datetoday}.csv', 'a') as f:
            f.write(f'\n{username},{userid},{current_time}')


################## ROUTING FUNCTIONS #######################
####### for Face Recognition based Attendance System #######

# Our main page
@app.route('/')
def home():
    names, rolls, times, l = extract_attendance()
    return render_template('home.html', names=names, rolls=rolls, times=times, l=l, totalreg=totalreg())


# Our main Face Recognition functionality.
# This function will run when we click on Take Attendance Button.
@app.route('/start', methods=['GET'])
def start():
    if 'face_recognition_model.pkl' not in os.listdir('static'):
        return render_template('home.html', totalreg=totalreg(), mess='There is no trained model in the static folder. Please add a new face to continue.')

    ret = True
    cap = cv2.VideoCapture(0)
    while ret:
        ret, frame = cap.read()
        if len(extract_faces(frame)) > 0:
            (x, y, w, h) = extract_faces(frame)[0]
            cv2.rectangle(frame, (x, y), (x+w, y+h), (86, 32, 251), 1)
            cv2.rectangle(frame, (x, y), (x+w, y-40), (86, 32, 251), -1)
            face = cv2.resize(frame[y:y+h, x:x+w], (50, 50))
            identified_person = identify_face(face.reshape(1, -1))[0]
            add_attendance(identified_person)
            cv2.putText(frame, f'{identified_person}', (x+5, y-5),
                        cv2.FONT_HERSHEY_SIMPLEX, 1, (255, 255, 255), 2)
        cv2.imshow('Attendance', frame)
        if cv2.waitKey(1) == 27:
            break
    cap.release()
    cv2.destroyAllWindows()
    names, rolls, times, l = extract_attendance()
    return render_template('home.html', names=names, rolls=rolls, times=times, l=l, totalreg=totalreg())


# A function to add a new user.
# This function will run when we add a new user.
@app.route('/add', methods=['GET', 'POST'])
def add():
    newusername = request.form['newusername']
    newuserid = request.form['newuserid']
    userimagefolder = 'static/faces/'+newusername+'_'+str(newuserid)
    if not os.path.isdir(userimagefolder):
        os.makedirs(userimagefolder)
    i, j = 0, 0
    cap = cv2.VideoCapture(0)
    while 1:
        _, frame = cap.read()
        faces = extract_faces(frame)
        for (x, y, w, h) in faces:
            cv2.rectangle(frame, (x, y), (x+w, y+h), (255, 0, 20), 2)
            cv2.putText(frame, f'Images Captured: {i}/{nimgs}', (30, 30),
                        cv2.FONT_HERSHEY_SIMPLEX, 1, (255, 0, 20), 2, cv2.LINE_AA)
            if j % 5 == 0:
                name = newusername+'_'+str(i)+'.jpg'
                cv2.imwrite(userimagefolder+'/'+name, frame[y:y+h, x:x+w])
                i += 1
            j += 1
        if j == nimgs*5:
            break
        cv2.imshow('Adding new User', frame)
        if cv2.waitKey(1) == 27:
            break
    cap.release()
    cv2.destroyAllWindows()
    print('Training Model')
    train_model()
    names, rolls, times, l = extract_attendance()
    return render_template('home.html', names=names, rolls=rolls, times=times, l=l, totalreg=totalreg())


# Our main function which runs the Flask App
if __name__ == '__main__':
    app.run(debug=True)
- Line 1-9: We are importing the required libraries.
- Line 11-12: Defining the Flask App.
- Line 14-15: We are defining a constant ‘nimgs‘ which defines how many images to capture for each user while registering.
- Line 17-18: Getting today’s date to use in the program ahead.
- Line 21-22: Loading the ‘haarcascade_frontalface_default.xml‘ HaarCascade file to detect faces.
- Line 25-34: Checking if the required folders are in place or not, If not create them. Also, create today’s attendance file if it’s not present in the Attendance folder.
- totalreg(): A function that counts the total number of registered users.
- extract_faces(): A function that extracts the face from an image. It uses the HaarCascade file we loaded above.
- identify_face(): A function that identifies the faces in the given image using the trained KNN model.
- train_model(): A function that trains the KNN model on all the faces available in the faces folder.
- extract_attendance(): A function that extracts information from today’s attendance file in the attendance folder.
- add_attendance(): A function that adds the Attendance of a specific user in today’s Attendance file.
Routing Functions:
- home(): Our main page routing function.
- start(): Our main function that will take attendance when we click on the Take Attendance Button.
- add(): Function to add a new user.
- The last 2 lines are to run the Flask App.
home.html
<!doctype html>
<html lang="en">

<style type='text/css'>
    * {
        padding: 0;
        margin: 0;
        font-family: 'Segoe UI', Tahoma, Geneva, Verdana, sans-serif;
    }


    body {
        background-image: url('https://cdn.pixabay.com/photo/2018/12/18/22/29/background-3883181_1280.jpg');
        background-size: cover;
        font-family: sans-serif;
        margin-top: 40px;
        height: 100vh;
        padding: 0;
        margin: 0;
    }

    table {
        border: 1px;
        font-family: arial, sans-serif;
        border-collapse: collapse;
        width: 86%;
        margin: auto;
    }

    td,
    th {
        border: 1px solid black !important;
        padding: 5px;
    }

    tr:nth-child(even) {
        background-color: #dddddd;
    }
</style>


<head>
    <!-- Required meta tags -->
    <meta charset="utf-8">
    <meta name="viewport" content="width=device-width, initial-scale=1">
    <link rel="stylesheet" href="https://fonts.googleapis.com/icon?family=Material+Icons">

    <!-- Bootstrap CSS -->
    <link href="https://cdn.jsdelivr.net/npm/bootstrap@5.0.0-beta3/dist/css/bootstrap.min.css" rel="stylesheet"
        integrity="sha384-eOJMYsd53ii+scO/bJGFsiCZc+5NDVN2yr8+0RDqr0Ql0h+rP48ckxlpbzKgwra6" crossorigin="anonymous">

    <title>Face Recognition Based Attendance System</title>
</head>

<body>

    <div class='mt-3 text-center'>
        <h1 style="width: auto;margin: auto;color: white;padding: 11px;font-size: 44px;">Face Recognition Based Attendance System</h1>
    </div>

    {% if mess%}
    <p class="text-center" style="color: red;font-size: 20px;">{{ mess }}</p>
    {% endif %}

    <div class="row text-center" style="padding: 20px;margin: 20px;">

        <div class="col"
            style="border-radius: 20px;padding: 0px;background-color:rgb(211,211,211,0.5);margin:0px 10px 10px 10px;min-height: 400px;">
            <h2 style="border-radius: 20px 20px 0px 0px;background-color: #0b4c61;color: white;padding: 10px;">Today's
                Attendance <i class="material-icons">assignment</i></h2>
            <a style="text-decoration: none;max-width: 300px;" href="/start">
                <button
                    style="font-size: 24px;font-weight: bold;border-radius: 10px;width:490px;padding: 10px;margin-top: 30px;margin-bottom: 30px;"
                    type='submit' class='btn btn-primary'>Take Attendance <i
                        class="material-icons">beenhere</i></button>
            </a>
            <table style="background-color: white;">
                <tr>
                    <td><b>S No</b></td>
                    <td><b>Name</b></td>
                    <td><b>ID</b></td>
                    <td><b>Time</b></td>
                </tr>
                {% if l %}

                {% for i in range(l) %}
                <tr>
                    <td>{{ i+1 }}</td>
                    <td>{{ names[i] }}</td>
                    <td>{{ rolls[i] }}</td>
                    <td>{{ times[i] }}</td>
                </tr>
                {% endfor %}
                {% endif %}
            </table>

        </div>

        <div class="col"
            style="border-radius: 20px;padding: 0px;background-color:rgb(211,211,211,0.5);margin:0px 10px 10px 10px;height: 400px;">
            <form action='/add' method="POST" enctype="multipart/form-data">
                <h2 style="border-radius: 20px 20px 0px 0px;background-color: #0b4c61;color: white;padding: 10px;">Add
                    New User <i class="material-icons">control_point_duplicate</i></h2>
                <label style="font-size: 20px;"><b>Enter New User Name*</b></label>
                <br>
                <input type="text" id="newusername" name='newusername'
                    style="font-size: 20px;margin-top:10px;margin-bottom:10px;" required>
                <br>
                <label style="font-size: 20px;"><b>Enter New User Id*</b></label>
                <br>
                <input type="number" id="newusereid" name='newuserid'
                    style="font-size: 20px;margin-top:10px;margin-bottom:10px;" required>
                <br>
                <button style="width: 232px;margin-top: 20px;font-size: 20px;" type='submit' class='btn btn-dark'>Add
                    New User
                </button>
                <br>
                <h5 style="padding: 25px;"><i>Total Users in Database: {{totalreg}}</i></h5>
            </form>
        </div>

    </div>

</body>

</html>
Download Source Code
Free Version:
Download the Source code for the Free version of Face Recognition based Attendance System
Paid Version:
- The paid version is a much more refined version.
- It has live date and time functionality.
- It has extra features like ‘List Users’ functionality from where we can list all the registered users and even delete the registered users.
You can Pay using the button below…
Working Video of our Project…
How to run the project
Do let me know if there’s any query regarding the Face Recognition based Attendance System by contacting me via email or LinkedIn.
Conclusion
Final year Python projects offer a unique opportunity for students to apply their programming skills to real-world problems, demonstrating their abilities and creativity to potential employers. By selecting relevant topics, planning diligently, and leveraging resources effectively, students can embark on a fulfilling journey of learning and innovation.
FAQs about Final Year Python Projects
How do I choose a suitable topic for my final year Python project?
Consider your interests, academic goals, and industry trends. Research potential topics and assess their feasibility and relevance to your skill set.
Is prior experience in Python necessary to undertake a final year project?
While prior experience can be beneficial, it is not a prerequisite. Final year projects serve as opportunities to learn and enhance your Python skills while tackling real-world problems.
How can I ensure the success of my final year Python project?
Start early, plan diligently, and seek guidance from professors and professionals. Break down the project into manageable tasks and iterate through the development process to refine and improve your solution.
What resources are available for final year Python projects?
Python’s extensive documentation, online tutorials, and community forums provide valuable resources for project development. Additionally, academic institutions often offer support through workshops, mentorship programs, and access to libraries and software.
How can I showcase my final year Python project to potential employers?
Create a portfolio showcasing your project, including a detailed description, code snippets, and demonstrations of functionality. Highlight your problem-solving skills, creativity, and ability to work independently or collaboratively.
So these were some best Final Year Python Projects that I can recommend to someone. If you have any queries contact me on my mail.
Read my previous post: Table Extractor Flask App
Check out my other machine learning projects, deep learning projects, computer vision projects, NLP projects, Flask projects at machinelearningprojects.net.
![[Latest] Python for Loops with Examples – Easiest Tutorial – 2026](https://machinelearningprojects.net/wp-content/uploads/2023/05/python-for-loops-1-1024x536.webp)