
So guys, in today’s blog we will be implementing Age Detection using CNN with the help of Keras. This is going to be a very fun project, So without any further due, Let’s do it…
Step 1 – Import all required libraries.
import cv2
import pandas as pd
import os
import seaborn as sns
import matplotlib.pyplot as plt
from tensorflow.keras.preprocessing.image import ImageDataGenerator
from tensorflow.keras.models import Sequential
from tensorflow.keras.layers import Conv2D, Dense, Dropout, Flatten, AveragePooling2D, GlobalAveragePooling2D
from tensorflow.keras.callbacks import ModelCheckpoint
import numpy as np
from sklearn.model_selection import train_test_split
from keras.utils import np_utils

np.random.seed(42)
tf.random.set_seed(42)
Step 2 – Read the input images and extract their labels.
all_images = os.listdir('combined_faces/')
ranges = ['1-2','3-9','10-20','21-27','28-45','46-65','66-116']

X = []
y = []

l = len(all_images)

for a in range(l):
    X.append(cv2.imread(f'combined_faces/{all_images[a]}',0))
    age = int(all_images[a].split('_')[0])

    if age>=1 and age<=2:
        y.append(0)
    elif age>=3 and age<=9:
        y.append(1)
    elif age>=10 and age<=20:
        y.append(2)
    elif age>=21 and age<=27:
        y.append(3)
    elif age>=28 and age<=45:
        y.append(4)
    elif age>=46 and age<=65:
        y.append(5)
    elif age>=66 and age<=116:
        y.append(6)
    print(str(a)+'/'+str(l))

np.savez_compressed('compressed image data.npz',x=X,y=y)
- Here we are reading our images in grayscale mode and storing them in X array.
- We are storing their ages in the y array.
- And finally, we are saving the X and y arrays in npz compressed format so that we don’t need to read images again and again.
How to load the compressed npz data…
loaded = np.load('compressed image data.npz')

X = loaded['x']
y = loaded['y']
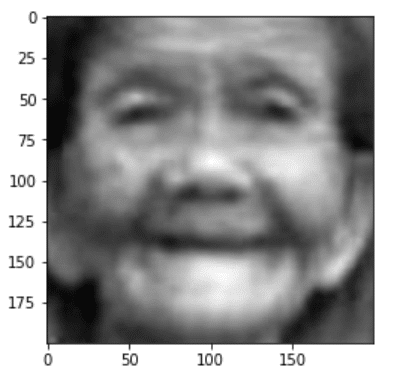
Step 3 – Visualize an image.
plt.imshow(X[0],cmap='gray')
Step 4 – One hot encode y array.
y = np_utils.to_categorical(y)
y
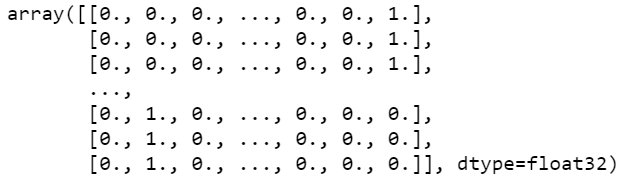
- Here we are simply one-hot encoding the y array using np_utils.to_categorical.
Step 5 – Train Test Split the data for creating Age Detection using the CNN model.
X_train, X_test, y_train, y_test = train_test_split(X, y, test_size=0.30, random_state=42)

X_train = np.array(X_train).reshape(-1,200,200,1)
X_test = np.array(X_test).reshape(-1,200,200,1)
- We are train-test splitting the data here and reshaping X in the correct format to feed it into the model in further steps.
Step 6 – Initialize some constants.
IMG_HEIGHT = 200
IMG_WIDTH = 200
IMG_SIZE = (IMG_HEIGHT,IMG_WIDTH)
batch_size = 128
epochs = 60
Step 7 – Create ImageDataGenerator objects for data augmentation.
train_datagen = ImageDataGenerator(rescale=1./255,
                                   horizontal_flip=True,
                                   shear_range=0.2,
                                   zoom_range=0.2,
                                   height_shift_range=0.1,
                                   width_shift_range=0.1,
                                   rotation_range=15)

test_datagen = ImageDataGenerator(rescale=1./255)
- Creating objects for data augmentation using ImageDataGenerator.
Step 8 – Augment the Data for Age Detection using the CNN model.
train_data = train_datagen.flow(X_train,y_train,batch_size)

test_data = test_datagen.flow(X_test,y_test,batch_size)
- Finally augmenting the data using flow.
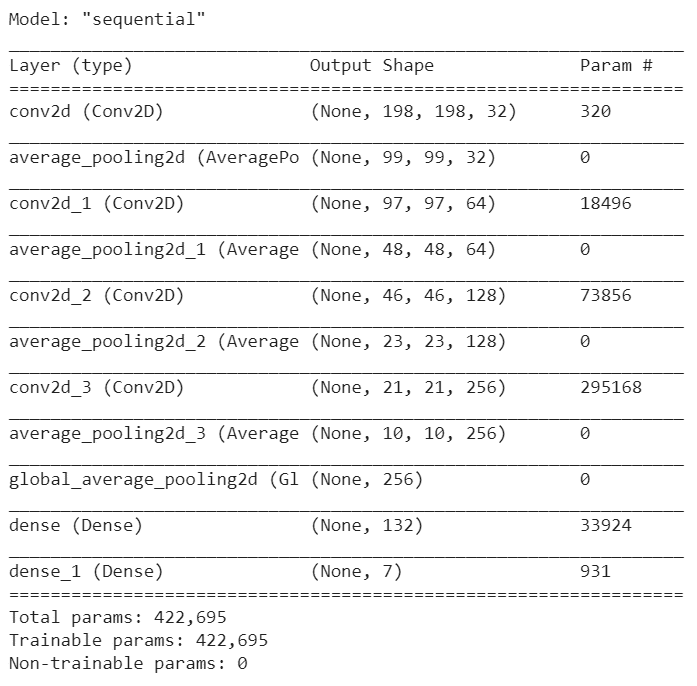
Step 9 – Creating the Age Detection using the CNN model.
final_cnn = Sequential()

final_cnn.add(Conv2D(filters=32, kernel_size=3, activation='relu', input_shape=(200, 200, 1)))    # 3rd dim = 1 for grayscale images.
final_cnn.add(AveragePooling2D(pool_size=(2,2)))

final_cnn.add(Conv2D(filters=64, kernel_size=3, activation='relu'))
final_cnn.add(AveragePooling2D(pool_size=(2,2)))

final_cnn.add(Conv2D(filters=128, kernel_size=3, activation='relu'))
final_cnn.add(AveragePooling2D(pool_size=(2,2)))

final_cnn.add(Conv2D(filters=256, kernel_size=3, activation='relu'))
final_cnn.add(AveragePooling2D(pool_size=(2,2)))

final_cnn.add(GlobalAveragePooling2D())

final_cnn.add(Dense(132, activation='relu'))

final_cnn.add(Dense(7, activation='softmax'))

final_cnn.compile(loss='categorical_crossentropy', optimizer='adam', metrics=['accuracy'])

final_cnn.summary()
- Here we have created and compiled our model.
Step 10 – Create a Model Checkpoint to save just the best model.
checkpoint = ModelCheckpoint(filepath="final_cnn_model_checkpoint.h5",
                             monitor='val_accuracy',
                             save_best_only=True,
                             save_weights_only=False,
                             verbose=1
                            )
- ModelCheckpoint is just a simple callback in Keras which says that store only the best model.
- The best model means the model with highest val_acuracy here.
Step 11 – Train the Age Detection using the CNN model.
history = final_cnn.fit(train_data,
                    batch_size=batch_size,
                    validation_data=test_data,
                    epochs=epochs,
                    callbacks=[checkpoint],
                    shuffle=False
                    )
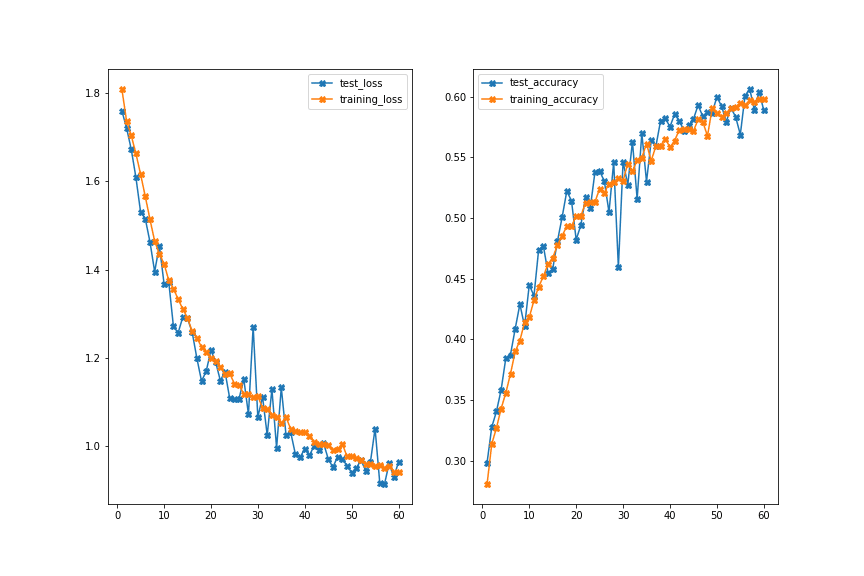
Step 12 – Visualize the training process.
plotting_data_dict = history.history

plt.figure(figsize=(12,8))

test_loss = plotting_data_dict['val_loss']
training_loss = plotting_data_dict['loss']
test_accuracy = plotting_data_dict['val_accuracy']
training_accuracy = plotting_data_dict['accuracy']

epochs = range(1,len(test_loss)+1)

plt.subplot(121)
plt.plot(epochs,test_loss,marker='X',label='test_loss')
plt.plot(epochs,training_loss,marker='X',label='training_loss')
plt.legend()

plt.subplot(122)
plt.plot(epochs,test_accuracy,marker='X',label='test_accuracy')
plt.plot(epochs,training_accuracy,marker='X',label='training_accuracy')
plt.legend()

plt.savefig('training.png')
Code for live webcam prediction of Age Detection using CNN…
import cv2
import imutils
import numpy as np
from tensorflow.keras.models import load_model

model = load_model('age_detect_cnn_model.h5')

detector = cv2.CascadeClassifier('haarcascade_frontalface_default.xml')

ranges = ['1-2','3-9','10-20','21-27','28-45','46-65','66-116']

cam = cv2.VideoCapture(0)

while 1:
    ret,frame = cam.read()
    if ret:
        faces = detector.detectMultiScale(frame,1.3,5)
        for x,y,w,h in faces:
            face = frame[y:y+h,x:x+w]
            face = cv2.cvtColor(face,cv2.COLOR_BGR2GRAY)
            face = cv2.resize(face,(200,200))
            face = face.reshape(1,200,200,1)
            age = model.predict(face)
            cv2.rectangle(frame,(x,y),(x+w,y+h),(255,0,0),2)
            cv2.rectangle(frame,(x,y+h),(x+w,y+h+50),(255,0,0),-1)
            cv2.putText(frame,ranges[np.argmax(age)],(x+65,y+h+35),cv2.FONT_HERSHEY_DUPLEX,0.8,(255,255,255),2)

        cv2.imshow('Live',frame)


    if cv2.waitKey(1)==27:
        break

cam.release()
cv2.destroyAllWindows()
- Line 1–4 — Importing required libraries.
- Line 6 — Loading the age detector model we trained above.
- Line 8 — Using Haarcascades to detect a face in the frame.
- Line 10 — Creating an age range array on which we trained our model.
- Line 12 — Initiating VideoCapture object to access the webcam.
- Line 14–32 — Reading image from webcam, detecting face, cropping out face, grayscaling the face, resizing the face, reshaping it to (1,200,200,1) format which is required by Keras models to predict, and then finally predicting the age range and showing it on the final image.
- Line 34–35 — Release the camera object and destroy all windows.
Final Results of Age Detection using CNN…
Download Source Code…
Download Data (Download combined faces.zip)…
Do let me know if there’s any query regarding Age Detection using CNN by contacting me on email or LinkedIn.
So this is all for this blog folks, thanks for reading it and I hope you are taking something with you after reading this and till the next time ?…
Read my previous post: CATS AND DOGS CLASSIFIER – EASIEST WAY
Check out my other machine learning projects, deep learning projects, computer vision projects, NLP projects, Flask projects at machinelearningprojects.net.


Can i get the pretrained model?