Hey guys, In this blog we will see how we can install Tensorflow with CUDA and cuDNN. This process can be tricky and frustrating if you are doing it for the very first time. So without any further due, let’s do it…
Let’s install Tensorflow with cuda and cudnn
Step 1 – Decide versions for CUDA,cuDNN, and Visual Studio
https://www.tensorflow.org/install/source_windows#gpu
- We will download the following versions.
- CUDA 11.2
- cuDNN 8.1
- Microsoft Visual Studio 2019
Step 2 – Download the CUDA Toolkit
Download Link – https://developer.nvidia.com/cuda-11.2.2-download-archive
NOTE – There is no Windows 11 version for CUDA 11.2 that’s why I used Windows 10 version and it worked like charm 🙂
Windows > x86_64 > 10 > exe(local) > Download

Step 3 – Download cuDNN
Download Link – https://developer.nvidia.com/rdp/cudnn-archive
- If you have an account on Nvidia simply Login otherwise click on Join Now.
- We will select the latest version of cuDNN (8.1.1) for CUDA 11.2 and we will download the zip for Windows.

Step 4 – Download Visual Studio 2019 Community.
Download Link – https://my.visualstudio.com/Downloads?PId=8228
- Login to Microsoft and then search Visual Studio 2019 and download the Community version.
- It will download a setup.
- Install that setup.
- It will ask to download workloads, just skip it and just install Visual Studio Core Editor.
Step 5 – Extracting and merging files
- Once you have successfully downloaded CUDA and cuDNN, install the CUDA toolkit by double-clicking on it.
- Agree and Continue > Express (Recommended). It can restart during the installation process.
- Then extract the cuDNN zip. It will produce 4 files.
- Copy all the files from the cuDNN folder and paste them into C:/Program Files/NVIDIA GPU Computing Toolkit/CUDA/v11.2 and replace the files in the destination.
- Now open the bin Folder and copy the path from the address bar.

- Now open the start menu and type env and you will see an option “Edit the System Environment Variables“. A window like the one below will pop up.
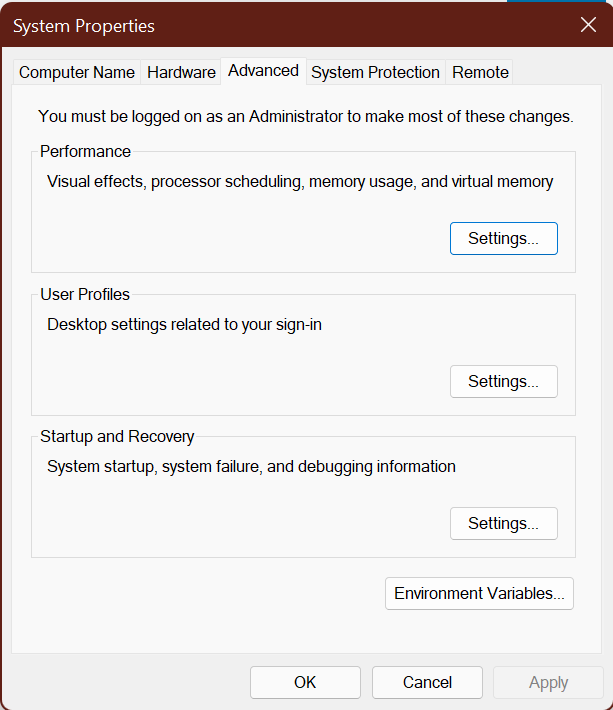
- Click on Environment Variables here.
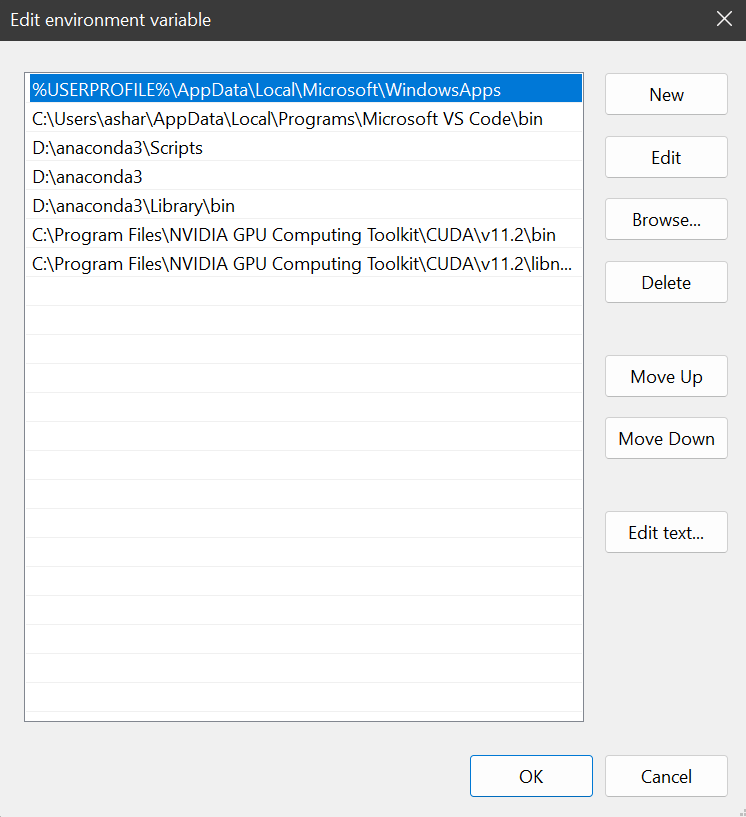
- In the user variables (in the top section) double click on Path and click New.
- Now paste the bin path you copied in a new field and hit OK.
- Now do the same steps for libnvvp folder also.
- Copy the path to libnvvp folder and add a new record in path.
RESTART YOUR COMPUTER.
Step 6 – Check the successful installation of CUDA
- Run the nvidia-smi command in your terminal.
- You can see in the top right corner, CUDA Version: 11.2
Step 7 – Create a conda environment and install TensorFlow
- Now open your terminal and create a new conda environment.
- Use the following command and hit “y“.
- Here gpu is the name that I gave to my conda environment.
conda create -n gpu python=3.9
- Activate the conda environment and install tensorflow-gpu.
conda activate gpu
pip install tensorflow-gpu
- Now simply copy the code below and paste it into a file named test.py.
# install tensorflow with cuda and cudnn

import tensorflow as tf
tf.compat.v1.disable_eager_execution()

with tf.device('/gpu:0'):
    a = tf.constant([1.0, 2.0, 3.0, 4.0, 5.0, 6.0], shape=[2, 3], name='a')
    b = tf.constant([1.0, 2.0, 3.0, 4.0, 5.0, 6.0], shape=[3, 2], name='b')
    c = tf.matmul(a, b)

with tf.compat.v1.Session() as sess:
    print (sess.run(c))
- Now run the python file in the conda environment.
- If you see these results, bingo!! we have successfully installed TensorFlow with CUDA and cuDNN support 🙂

Conclusion
Installing TensorFlow with CUDA and cuDNN enables you to leverage the power of NVIDIA GPUs for accelerated deep learning computations. By following the steps outlined in this article, you can successfully set up TensorFlow with GPU support and enhance the performance of your machine learning workflows.
So this is how you will install TensorFlow with Cuda and cuDNN in Windows, thanks for reading it and I hope you are taking something with you after reading this and till the next time…
FAQs
What is TensorFlow?
TensorFlow is an open-source machine learning library developed by Google Brain for building and training neural networks.
What is CUDA?
CUDA (Compute Unified Device Architecture) is a parallel computing platform and application programming interface model created by NVIDIA for GPU-accelerated computing.
What is cuDNN?
cuDNN (CUDA Deep Neural Network library) is a GPU-accelerated library of primitives for deep neural networks, providing highly optimized implementations of standard deep learning operations.
Why use GPU acceleration with TensorFlow?
GPU acceleration allows for faster training and inference of deep learning models, significantly reducing computation times compared to using CPUs alone.
How can I troubleshoot installation issues?
If you encounter installation issues, refer to the troubleshooting guides provided in the documentation of TensorFlow, CUDA Toolkit, and cuDNN. Common issues include compatibility problems, installation errors, and configuration issues.
Check out my other machine learning projects, deep learning projects, computer vision projects, NLP projects, Flask projects at machinelearningprojects.net
Hello,
That was very helpfull ! 🙂
I would like to know if you know how to install MirroredStrategy for multiple gpus configurations.
I tried to follow Tensorflow’s directions but I always have problems with libraries or misplaced files. I end up with an error like :
“`
Registered devices: [CPU, GPU]
Registered kernels:
“`
Thanks if you have an answer for me.
Have a nice day!
Hi,
Thanks for this post. I think step 6 works differently: nvidia-smi shows the current driver and the CUDA version supported by this driver. I currently have Nvidia driver 527.56, which supports CUDA version 12.0, but I don’t have 12.0 installed.
No, it’s not like that. It shows the installed CUDA version.
scratch that, i missed i have to double click on Path for that page to even show up. cheers, good guide 🙂
Hope this helped 🙂